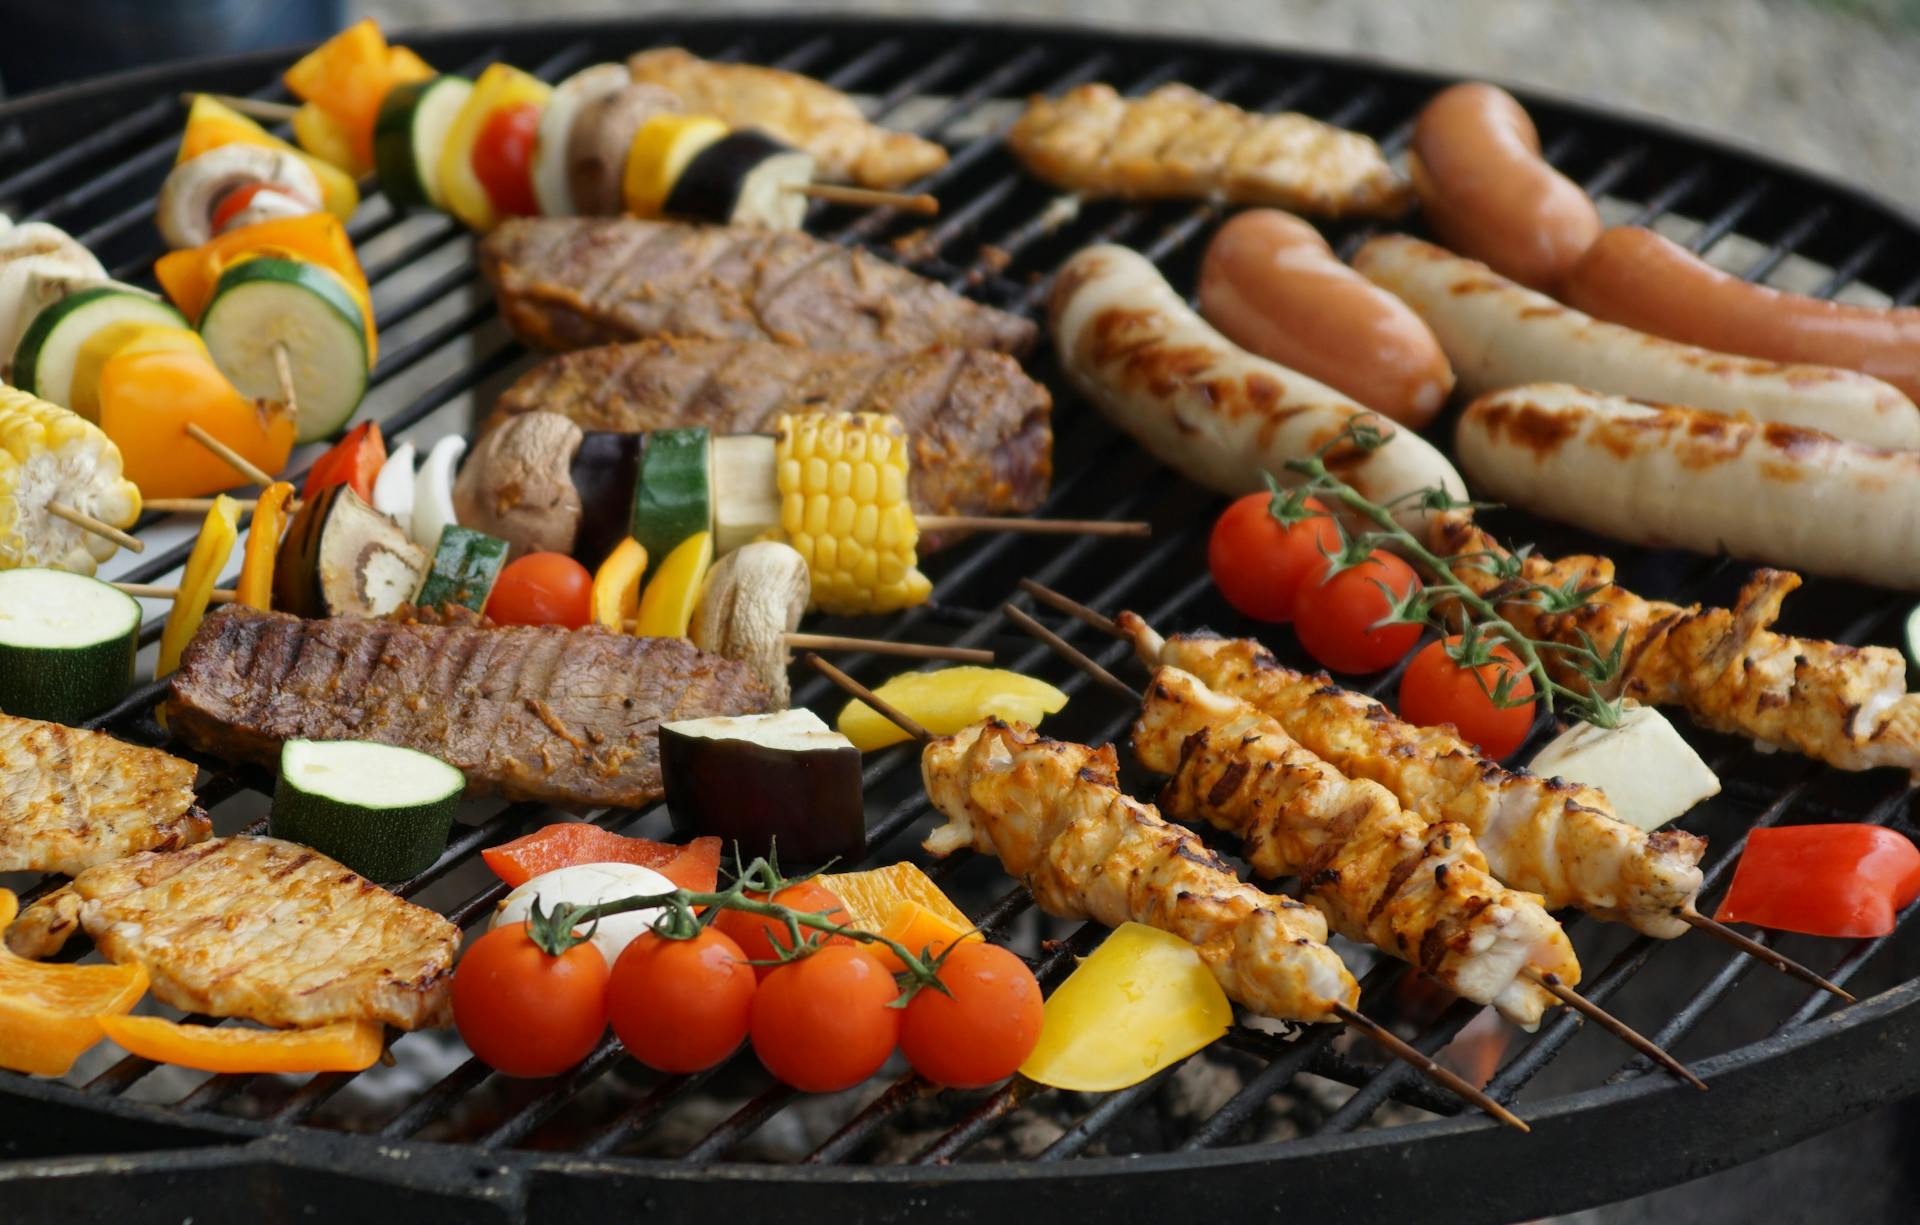
If you are like many backyard cooks, you've probably heard great things about the Big Green Egg––the versatile, multi-functional charcoal grill and smoker most commonly used to cook a variety of dishes. But what if it's your first time using the Big Green Egg? Knowing how to light it is important before you begin cooking. Here's a step-by-step guide on How to Light A Big Green Egg:
Step 1: Fill the Firebox with Charcoal. Start by filling up the firebox with lump charcoal just below the cast iron top vent. Lump charcoal produces higher temperatures than briquettes and burns reduced amounts of ash, resulting in less build up over time which makes it perfect for big grilling tasks such as smoking meats or slow roasting vegetables on The Big Green Egg.
Step 2: Use Wood Chunks & Smoker Boxes For Flavorful Smoke. If you want more flavorful smoke while your grilling, add a few wood chunks onto the hot coals during your operation—hickory is one of the best woods to use with The Big Green Egg—and sooty oak is best for poultry recipes while cold smoking. If chips don't work in tight spaces within your unit, there are also smoker boxes designed specifically for The Big Green Egg that will also work well when placed on top of your hot coals when filled with chunks or chips accordingly for flavorful smokiness throughout your cooking process.
Step 3: Utilize Plate Setter For Specific Temperature Control & Heat Circulation During Cooking Or Smoking Processes. Before lighting The Big Green Egg insert what’s called an "Egg Plate Setter" into its main chamber in order to regulate temperature control and air flow throughout each recipe or project you may be working on at any given point in time throughout grilling operations—this means every dish can be cooked precisely verified through a reliable thermometer as they come out hot off The barbecue pit!
Step 4: Activate Your Air Intake System & Open Vent Dome To Let Out Excess Heat & Smoke While Grilling/Smoking.. Finally open up both external lower vents towards either side near both ends where applicable and ensure all internal pieces (plate setters) have been properly inserted inside given ceramic dome as well so heat and smoke can escape from top chamber itself during actual barbecuing process later down road when attempting various project types related food items recipes!
Step 5: Light Up Your Firebox!. Now simply light up some crumpled newspapers that have been stuffed inside designated firebox area along base skillet perimeter region itself before adjusting height based altitude dials directly across table side then start fanning accordingly until embers achieve desired hotness combustion state needed wait post successful ignition attempts themselves!
Following these steps should help make sure take proper care precautions necessary maintain reliably consistent heat/smoking productions all times! Good luck - happy grilling everyone who plans give big green egg range test drive scenarios near future parameters!
If this caught your attention, see: Buy Frankfurt Green Sauce
How to clean a Big Green Egg?
If you're an outdoor enthusiast and a BBQ lover, chances are you've heard of the Big Green Egg. This revolutionary outdoor cooking device is beloved by many for its versatility and ability to deliver high-quality dishes. But like any other kitchen tool, it requires regular cleaning and maintenance in order to keep it working its best. Here's a step-by-step guide on how to clean your Big Green Egg in no time:
Step 1 - Give It A Wipe Down.
Start off with a general wipe down of the outside of your egg – this should take just a few minutes with some warm soapy water, or even some decarbonization solution if your egg has been sitting unused for an extended period of time. Be sure not to use abrasive cleaning pads or sponges as these may leave scratches on the exterior finish. After wiping down what you can see, check underneath the egg for any buildup that may have occurred over time; if necessary remove with cleaners such as Big Green Egg Grill Cleaner® or Gunk® Degreaser sold at most hardware stores.
Step 2 – Get Inside And Scrub Away.
Once the outside is taken care of it’s time to tackle the inside! Start by removing all remnants from previous cooks such as wood chips and ashes before using a soft-bristled grill brush (Big Green eggs purpose specific brushes work best)to scrub away any remaining buildup that has accumulated over time; be sure not to let too much build up occur as it could interfere directly with heat regulation when preparing future meals. If stubborn spots remain try dipping your brush in combination of warm water and baking soda paste which should do wonders in blasting away any leftover residue from those hard-to reach places! Finally, give everything one last go around with warm soapy water making sure all surfaces are completely dry before replacing into position within your Big Green Egg.
Step 3 - Degrease Those Grates.
Lastly, go ahead grab hold of those grates situated at each side during cooking season make sure they don’t contain any leftovers from past sessions that could ruin an otherwise amazing meal; for best results degrease them once again using either same solutions used throughout rest course process. After which make certain mask off residues cold running affording chance further stronger cleaner when necessary. Once fully saturated allow previously discussed answer deep soak thoroughly ensure quality remains intact once barbecue masters ready return fire their lords.
Readers also liked: Big Green Egg
How to prepare a Big Green Egg for grilling?
The Big Green Egg is an amazing grill that can help make your grilling experience truly out of this world. If you’re looking to maximize its use, you need to know how to properly prepare it for a cookout. Here are some simple steps you need to follow for the best results:
1. Start by firing up the Big Green Egg – Opening the lid and load in some charcoal briquettes and get light them with an electric starter or other material like tinder, kindling wood and paraffin wax cubes – this will give you a good blaze to start with. Once they are smoldering, adjust the vents on top and bottom of the grill lid to get an even temperature inside.
2. Preparing Food - Make sure your food is prepped before placing it on the Big Green Egg so that there’s no risk of cross-contamination; remove any fat or membranes from meats (it also helps keep flare-ups under control) & slice vegetables into smaller pieces so they cook faster & evenly on the grill grate. For fatty cuts such as pork shoulder or ribeye steak, place them directly over indirect heat since direct flames near these items can cause messy flare ups & charring.
3. Heat Adjustment - You can regulate temperatures in two ways: either by opening/closing vents on top/bottom lids or adding more fuel when needed (especially for longer cooks). Keep an eye on thermometers mounted inside both lids so you can maintain a consistent heat throughout cooking process; shift foods as needed as hotspots appear which ensures even doneness throughout meal!
4 Clean Up - After cleanup while everything’s still hot pour some water into ashtray & replace grate if used avoid rust buildup—gives fresh start next time using The Big Green Egg! Finally cover entire unit with cover provided at purchase—this helps protect it against rain & snow while maintaining optimum condition when not being used!
Now that you know all about preparing your Big Green Egg for grilling season, go out there and enjoy amazing meals cooked over this incredible piece of kitchen equipment!
Related reading: Clean Big Green Egg
What is the best way to light a Big Green Egg?
Using the Big Green Egg is an incredible way to cook your favorite foods, but getting the cooking environment just right can be a challenge. Lighting the egg properly is essential to having great results. Here are some tips for lighting your Big Green Egg for delicious and flavorful meals.
Firstly, you'll need to ensure your egg is well ventilated and at least 2 feet away from any combustible materials like wood or cloth. This will help prevent fires and damage to property! Once everything is in order, it's time to get good fire management started.
Using natural lump charcoal as fuel rather than briquettes works best in a Big Green Egg – they last longer and burn hotter which can be beneficial before adding food onto the grill or smoker insert plates. To light it, you’ll need some crumpled paper or a lighter cube stuffed into one corner of natural lump charcoal mound which will help ignite all of it within 10 minutes (but start sooner if windy conditions are present). It's important that the paper isn't more than two finger widths high so don't overdo it! When ready with lighted coals on one side of the Egg, close both top and bottom air vents halfway open before using a fire starter tool such as fireplace matches or long-neck lighter fluid (never use flammable liquid near open flames)to slowly raise temperatures inside by slowly rotating both top/control knob vents between 1/4 inch openings over 15-20 minutes until desired temperature has been achieved - usually takes 30 minutes to reach low & slow temp settings (~325°F) expected when smoking meats whilst High Heat will use ~475°F setting about 15 minutes later when baking breads etcetera!
Finally open all vents wide for Grill Mode cooking on higher heat above 500°f with intensified smoky flavorings; suggestions include hardwood chips hazelnut shells & blend rubs every 20 mins going 1 hour+ - avoid scattering chips directly onto coals because they could flare up intensely (and aren't smokeless either)! Lowering temps afterwards may take another hour so think this through patiently before returning lid etcetera ...you'll do fine now with these tips!!!
If this caught your attention, see: How Much Just Egg Is Equal to One Egg?
How to adjust the heat on a Big Green Egg?
Cooking on a Big Green Egg is becoming increasingly popular among outdoor chefs looking for delicious, flavorful recipes. It's well-known that the Big Green Egg allows you to cook with indirect heat, meaning you don't need to worry about food burning because of direct flames. But how do you adjust the heat to get just the right temperature?
The first step is understanding how the Big Green Egg controls its temperature so that you can fine-tune your settings and achieve success in your cooking. The Big Green Egg is fueled by charcoal and it uses a patented Draft Door System to regulate oxygen intake and control heat flow while cooking. This system enables chefs to achieve precise temperature control much like they would on a traditional gas grill or smoker.
To adjust the heat on a Big Green Egg, begin by adding charcoal briquettes or natural hardwood lump charcoal through either the draft door – top middle piece – or main vent - located at the bottom front of cook chamber - depending on your model. For instance, if more air needs come into your unit turn clockwise so air can enter through both vents; however if more fuel needs come into place turn counterclockwise allowing some air exit as well as fueling with wood/charcoal coming in from both points which will give steady temperatures while building up smoke ring effect simultaneously sin alpha inhalation further down offering an even burn.
After ensuring there’s enough fuel in place, close all vents until only 1/8th inch visible by using hand tightness rather than tools such as pliers for lowest temperatures works best instead of over working charring effect causing higher temp results for too long periods of time otherwise known as chef fire due heavy smoke buildup movement slowly opening holes one at a time until desired level reached usually taking about 30 minutes for set up. Once desired temperature is achieved remember note down settings for further use without having guesswork each time.
Finally, ensure that thermometer probes are properly installed within grill’s interior walls relative distance necessary other wise accuracy compromised after adjustments done,turn dome top lid open &check temps reading stayed same levels noticed before opened lid when adjusting knob positions confirming readings feel free experiment closer dial setting (1click lower max adjustment) when wanting slight enhancements eg (smoking &low roasting applications ending up perfect desire end dish product).
With patience and practice it will become easier to adjust temperatures and regulate airflow which will lead to delicious meals cooked perfectly every time!
Readers also liked: Regular Charcoal
What type of charcoal should I use with my Big Green Egg?
Using the correct type of charcoal for your Big Green Egg is integral to ensure that you get maximum value for your money and cook the most delicious food.
First and foremost, it’s important to choose natural lump charcoal. This is ideal because it has no added chemicals or additives, meaning it burns quicker and more evenly than briquettes. Lump charcoal also has less of an odor due to its lack of filler, making it a preferred choice among Egg owners. When shopping around, bear in mind that some brands contain high amounts of sodium-based nitrate – so make sure you read the label carefully before buying!
Your main choices are hardwood lump charcoal or hickory lump charcoal – both provide excellent heat output with minimal ash production when used correctly. Generally speaking, hardwood will burn slightly cooler than hickory and imparts a milder flavor in cooking – perfect if you’re going for a subtle smoky taste! That said, some people prefer hickory as they feel it produces a stronger smoke flavour which works particularly well with stronger meats like beef or game birds. Ultimately it comes down to personal preference!
Whichever type you decide on for your Big Green Egg, remember that there are other factors involved too like ventilation and temperature control to further influence how long the coals will last and how evenly they burn throughout cooking time - so always make sure you have these elements right before getting grilling!
How to maintain a Big Green Egg so it lasts longer?
If you're a proud owner of a Big Green Egg, then you know that with proper maintenance, it can stay in good condition for years. In order to keep your Big Green Egg in great shape, there are some simple things you should do on a regular basis.
First and foremost, keep it clean! After every use, make sure to give the inside and outside of the egg a thorough brushing and wiping down. Stray food particles can get stuck and cause bacteria or mold growth which could eventually chip away at the longevity of your egg shape.
It's important to remember to apply oil after each cleaning as well. This will help prevent rust from setting in on the exterior surface of your egg and decrease any chance of agitation from heat transferring directly onto one spot during use. Additionally, oiling helps reinforce its natural non-stickiness for even more efficient grilling experiences.
Finally, store it right! This is mostly relevant if you don't plan on using your green egg over long periods - like if you want it out of sight during winter - but never underestimate how big an impact storage methods can have on keeping tough materials (like ceramic or cast iron) intact over time. It's recommended that when not in use for prolonged amount o time: (1) ensure all vents are blocked off so extra humidity doesn't set in; (2) wrap up your enclosed grill with heavy cloth or put into an insulated bag; (3) place mats underneath its stand so vibrational shock cannot reach the bottom surface layer; and lastly (4), shift it regularly so no single side takes too much pressure due to weather conditions/changes experienced by surrounding material items/area directly adjacent to where its being stored at home/on-site location outdoors/in greenhouse etc...
By following these steps over consistently through many uses - whether frequent BBQ gatherings with friends & family or slow burning kamado-style meals meant for savoring single servings - your Big Green Egg should remain intact unlike any other cooking device around!
Featured Images: pexels.com